Assignment
Install WordPress
We will be going through this in class. By next Tuesday, everyone must have WordPress installed.
Lecture Notes
Installing WordPress
There are many ways to install WordPress. Refer to the WordPress Installation guide for more information.
Download -> Upload Method
You can get wordpress from WordPress.org by clicking the giant “Download” button on the site. This will give you a zip file, which you will have to extract and upload to your server. Mike Sinkula has written excellent instructions for using this method. However, if you have command line access to your webserver. You can do this much faster and easier that way…
If you have a fear of the command-line and don’t believe you will need it in the future (if you are not here to become a Web Developer–don’t feel bad, it’s not the only vocation), you can proceed to follow Mike Sinkula’s non-command-line instructions. I will walk around and help you after class if you need it.
Command Line Methods
We will be using some command-line here. This is crucial for web development. You must get familiar with the command-line. Here’s a primer (although, we will be covering more of this in class).
If you are on a dedicated host (you have root access on your machine), you can install WordPress as you would any other application:
Debian/Ubuntu APT:
sudo apt-get install wordpress |
However, on a shared host (like Dreamhost or Zephir), you won’t be able to do it that way. Dreamhost has a 1-click install that’s drop-dead simple to use, but other hosts may not have that option. Instead, you can use the wget command (web get) to download the latest wordpress directly to your web hosting server. Then you can unpack the archive on that machine, configure it via the web and you’re done. This is the method we will use.
Step 1: Login to your remote server (via SSH)
If your Seattle Central username is jdoe0001 for your O: drive, edison web, macs etc… this is your information:
- SSH username = jdoe0001
- SSH password = last 6 of SID
- MySQL username = jdoe0001
- MySQL Database = jdoe0001
- MySQL Password = set at https://zephir.seattlecentral.edu/mysql
if you are using your Zephir account, please check out the Zephir Manual
If you are logging into another server (like Dreamhost), you will need to use your ssh username and password for that account–and you will connect to your domain name instead of zephir.seattlecentral.edu
Windows
Open Putty:

Enter zephir.seattlecentral.edu (or your personal web domain) into the “Host Name” field. Make sure the port is set to 22 and Protocol is set to SSH.
Note: Always use SFTP/SSH to connect to your web server! FTP is insecure, passing both your username/password and all of your data unencrypted from your location to your server (which may have many computers listening between the two locations).
Click “Open”.
If there is a PuTTY Security Alert dialog, click “Yes”.
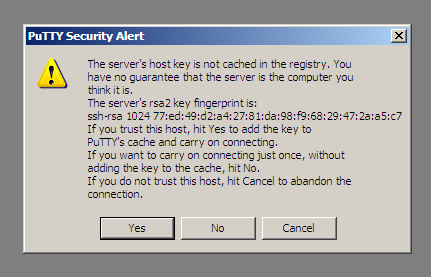
You will now have a login prompt:

Enter your username. Hit enter, then enter your password:
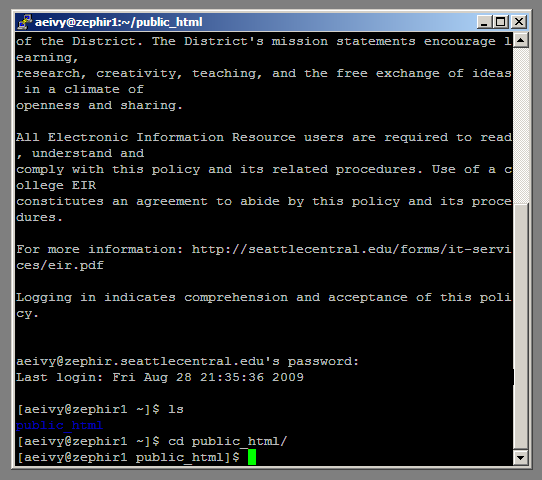
You are now have command-line access to your web server over an SSH (secure shell) connection. You can now run commands (but be careful as the linux command-line will allow you to shoot yourself in the foot if you point a gun at your toes).
OSX
Open Terminal (Command + Space, type “Term” and select the application “Terminal”)

Connect to your server using the SSH (Secure Shell) command
ssh -l {username} {host} |
Example:
ssh -l jdoe001 zephir.seattlecentral.edu |
If you get a warning, type ‘yes’ (without quotes) and hit enter. Then enter your password.
Step 2: Download and unpack wordpress (remotely)
if you are on zephir, change into your public_html folder with the cd command:
cd public_html |
If you are not on zephir, change into your web directory.
Now run the following three commands to download, extract and cleanup the wordpress archive.
1. wget (web get) is the command that fetches a file from a remote location. WordPress constantly updates the same location with an archive of it’s latest release so you always know where to find it. The wget command only requires one parameter, the location of the item to get:
wget http://wordpress.org/latest.tar.gz |
After running this command, you will have a file in your current directory named ‘latest.tar.gz’.
2. tar is an archive application that we can use to extract the files from the .tar.gz file. The tar command has a lot of options. The ‘-xzvf’ specifies the options for the tar application:
tar -xzvf latest.tar.gz |
Now you will have a folder called ‘wordpress’, which contains the wordpress application.
To learn more about tar, type ‘man tar’ to read the tar application manual.
3. rm is the command for removing files. We don’t need the archive anymore, so delete it:
rm latest.tar.gz |
Step 3: Configure WordPress
The simplest way to configure your new WordPress install is to use the Web Interface.
Open up a web browser and enter your domain with the “wordpress” directory following it (this is where we just installed WordPress):
http://zephir.seattlecentral.edu/~username/wordpress/
Example:
http://zephir.seattlecentral.edu/~aeivy/wordpress/
If you installed WordPress to your root directory, just go to your web domain.
You will see something that looks like this:

Click the button :)

Click the button :)

Enter your details and save it.

Click “Run the Install”

Enter a Title and your Email

Copy this password before you click “Log in”

Type ‘admin’ for Username and paste in the password you copied from the previous page.
Step 4: Change Your Password
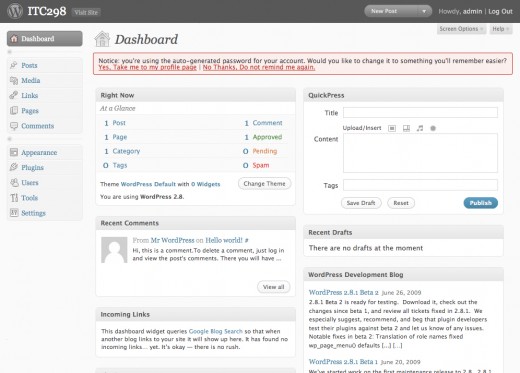
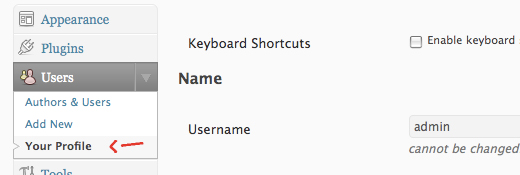
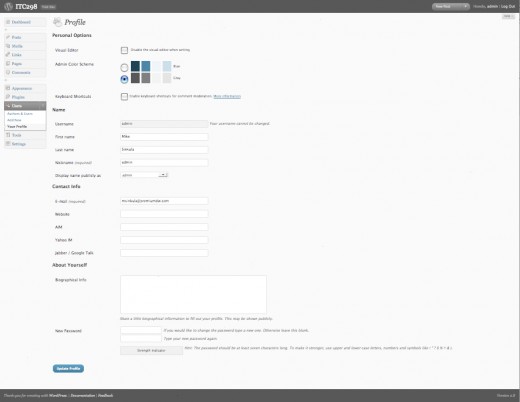

More information on Your Profile: http://codex.wordpress.org/Your_Profile_SubPanel
Congrats! You’ve just installed WordPress
